copy in case deleted
Skills


Items
-
Head
-
 Crown of the Light
- Stat Priority: None
-
-
Shoulders
-
 Mountain of the Light
- Stat Priority: None
-
-
Amulet
-
 The Traveler's Pledge
- Stat Priority: None
-
-
Torso
-
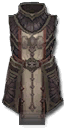 Heart of the Light
- Stat Priority: None
-
-
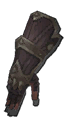
Wrists
-
 Gabriel's Vambraces
- Stat Priority: None
-
-
Hands
-
 Will of the Light
- Stat Priority: None
-
-
Waist
-
 Sacred Harness
- Stat Priority: None
-
-
Legs
-
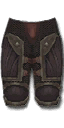 Towers of the Light
- Stat Priority: None
-
-
Feet
-
 Foundation of the Light
- Stat Priority: None
-
-
Rings
-
 The Compass Rose
-
 Convention of Elements
-
 Obsidian Ring of the Zodiac
- Stat Priority: None
-
-
Weapon
-
 Johanna's Argument
- Stat Priority: None
-
-
Offhand
-
 Guard of Johanna
- Stat Priority: None
-
-
Legendary Gems


Kanai's Cube
-
Faithful Memory

-
Hammer Jammers

-
Obsidian Ring of the Zodiac

Table of content:
1. Introducti on
2. Stat priority
3. Some basic stuff to keep in mind
4. Some tips for the rifts
5. Build diversity and explanations on it
6. Skill breakdown
7. Additional notes
1. Introduction
Youtube chnl with all the clears: https://www.youtube.com/user/Sujo97/videos
This is the solo softcore pushing build (for HC you probably need to get unity instead of CoE). The class itself isn't part of the meta sadly. Yes, you can try to get a group for something like the wizard runs instead of one of the wizards, or instead of one of the dps in 90+ runs, but the fact is, the spec just doesn't fit in groups. In higher runs you have to build it around area damage, which then causes lag for the whole group, and in wizard runs you're just not needed, as you're both too slow and not doing nearly as much damage as the wizards. You will basically be carried in those groups, so unless you're playing with some friends that don't really care about any of that, you would be better of playing something else. Barb in higher speeds is an excellent choice as you can get your gear for the torment farming spec there (LON), and on top of that you can get your rings. Since some will ask, this is the build I recommend using for torment farming:
https://www.d3planner.com/696465645
It's not too hard to gear up and works fine up to t12-13. For t13 you might need some paragons/augments however.
Now a little bit about the build. First and foremost, the skills and gear are both basically set in stone. There's very little wiggle room when it comes what you can change with this build. The items listed here are all a must, and spec just doesn't work if you're missing something. This is especially important for new players that don't really know much about hammerdin or crusader in general. Some other options for example in cube might look like they're almost as good, but they really aren't. Faithful memory and hammer jammers are what the build is built on due to the way how much they multiply your total damage output.
Same goes for the sets you have, the endless walk set is always worth using, even if you don't have a good travelers/compas, and you can't play without 6pc seekr. Don't try to fiddle with the build, as it's been proven that it's working like this for 3 seasons already.
The one thing that you can change would be the law. It really is personal preference what you use there. I myself prefer running it with law of hope. Some people like law of valor. Most of this will be explained later on, what are benefits and drawbacks of each, so just keep on reading.
Other skills really should be left as they are.
2.Stat priority
Now for some people it will all be about min-maxing here, squeezing every little bit of dps they can to push as high as they can, and be on the edge of survival in the process of it all. That's basically what I'm doing with my gear every season. You basically have to play a bit to see if the gear you have fits you, and if it doesn't, you kind of have to know what's the issue, is it lack of damage, lack of toughness, or maybe something else.
For most people reading this however, it's going to be lack of toughness. To understand how to fix this, the first thing you need to know for hammerdin is: your toughness stats aren't the thing keeping you alive, it's actually keeping your defensive buffs up, and having enough recovery to keep you going. Obviously you'll still need some vit, life%, allres on your gear, but it's really the dropping of defensive buffs that gets you killed since most of them basically double your toughness. If two of them drop off, you're basically down to a quarter of your toughness.
2.1. Cooldown reduction and cooldown management
For most people, it won't matter what slots come with it. The standard ones are usually shoulders (optimal stats being str, vit, allres, cdr), and gloves (str, cdr, cc, chd and if you can get a quadfecta, with high enough paragon you can go for attack speed instead of str as well). After these two, it really comes down to how good your gear is and where you can get it without dropping too many dps stats. Weapon is a popular choice as it rolls up to 10% cdr.
2.1.1. Cooldown reduction
In my opinion, CDR is the most important stat on the hammerdin. Without it you cannot keep the defensive buffs up and survive, and even if you can survive but the buff drops, you'll start panicking and running around trying to get your cooldowns back up, when you should be dpsing. If you can't survive you're doing no damage anyway, so if you went for that extra crit % when you really should've gone for the cooldown, and then couldn't survive because you couldn't keep your buffs up, the crit % won't really matter, will it?
So, how much cooldown do you need. Well to start off, you need to put 50 points in paragons into it, take fervor passive, you need diamond in helm, you need to run with gogok and you should have at least 3 items that have cooldown rolled on it. This should bring you to around 47~% cooldown be4 gogok stacks. This is in my opinion the bare minimum you need to have, and honestly I'd only recommend it if you already know what you're doing, and if you have good gear. If you're a new hammerdin, you should maybe get that 4th item with it. It will make your life a lot easier, and almost completely remove the "oh shit I'm dying" panic moments.
2.1.2. Cooldown management
Ok so this might sound weird, but there's a reason this got a mini paragraph of its own. This basically comes down to how you're using your skills. I STRONGLY recommend you DON'T use macros for casting your iron skin and provoke. The way zodiac works is basically when it procs, it's random which skill loses a second of its cooldown. So what you really want to do is to lower the usage of skills you don't really need atm. Provoke is usually the main culprit of the whole cooldown mess as people just spam it non stop and insta use it when it's off cooldown. You want to only use it if you need the wrath. If you're surrounded by 10-20 mobs, there's no point using it non stop, your full wrath will instantly fully refill, so if that's the case, wait till your wrath drops to a certain lvl and then use it, instead of using it when you still have 80% of your wrath.
Same goes for iron skin, if the cooldown on it is reset, but you still have the defensive buff, just wait a bit till it almost expires, and then reuse it.
You can do the same with akarath, and that way you can also save the proc on it, as once you reuse the skill you will get a new proc from the prophet rune as well ready to be used again (even if you proced literally a second be4 you used it again). It's really useful doing it like that, say if you're preparing a conduit or power and want to make sure you survive it.
The other part of cooldown management comes to movement. No matter what, moving is a dps loss, even if you're stutter stepping (basically holding the hammer button and then quickly tapping the force move key). Obviously stutter step is a smaller dps loss than flat out just moving to the next spot but yea, you still want to minimize it. Especially since you're also dropping the damage buff from your endless walk set (moving by jumping with falling sword will not lose your offensive endless walk stacks).
Last but not least, using falling sword too often. Falling sword basically means not casting hammers for 1.5 secs, so its basically wasted time that you didn't spend casting hammers and resetting cooldowns. This is basically the reason I use law of hope, and some people use flash rune on iron skin, as it lets you stutter step to a different location, say if you want to go for the oculus, or move out of dangerous affixes. Using falling sword too often basically means more zodiac procs have to go into the falling sword, and you're spending less time actually attacking.
2.2. Recovery stats
LPH/LPWS is a MUST!
If you're only doing low runs it won't matter much, but then again you shouldn't be doing low runs with this spec to begin with. For higher runs it's basically as important as cooldown, as it's what's keeping you alive in the rift. By default you already have some gearing, from paragon points life per hit, and holy cause. However once you start going higher this will just not be enough.
You will want to use get it on either weapon or shield to get the life per hit (wpn only), or life per wrath spent (wpn,shield). Life per hit rolls on some other slots as well but it rolls are only half as high as the one on the weapon (except for amulet but you really want to have a holy, cc, chd travelers).
I personally prefer to roll with LPWS as it feels a bit more consistent as you're not relying on the procs to kick in from LPH(basically all spells have proc coefs, so the healing can be really random), LPWS just insta heals you when you cast wrath spending skills. But honestly both work and it comes down to personal preference. Also just one of these stats should be enough to sustain you, you don't need to get it on both items.
2.3. Attack speed and breakpoints
I wouldn't say attack speed is more important than other dps stats, but it's really nice to have, since it helps a bit with cooldown resetting as you're attacking faster and proccing zodiac more. It however really needs to be optimized correctly, and if you're just carelessly putting attack speed on your gear, that extra piece of attack speed might not actually get yo to the next breakpoint. To understand how much attack speed you need, you must first understand how the whole thing works. So what are breakpoints?
The way the game works with some skills, and the way hammers work in this case, is the game is counting as if there are 60 frames in a second and certain skills take a certain amount of frames to perform their animation.
Now when someone says "I'm at 12 breakpoint on the blessed hammer", what they mean is: "my blessed hammer takes 12 frames to cast", meaning they can cast 5 of them each second. So if you manage to push yourself to the lower breakpoint, it'll basically mean your dps is getting increased by you casting more skills in the same time.
These are the breakpoints we are interested in:
Breakpoint - - - -Attack speed needed
14 - - - - - - - - - - 1.7196
13 - - - - - - - - - - 1.8519
12 - - - - - - - - - - 2.0062
11 - - - - - - - - - - 2.1886
10 - - - - - - - - - - 2.4075
To dumb it down a bit and make it easier to put in perspective, you need:
13 bp: Having gogok alone gets you to this one.
12 bp: Having another piece anywhere on your gear (this includes 5% rolls). For most people this should be fine. It's easy to get to this bp, and like I said, the roll itself doesn't matter where it rolled and with how much % it rolled. It also lets you use both enchantress or templar, depending what you prefer more.
11 bp: If you don't want to use enchantress (meaning you don't have focused mind), you need 7% on weapon, and 7% on another piece to get to this bp.
With enchantress you need either 2 7% rolls (if neither rolls are on weapon), or 5% + 6% rolls (if at least one of them rolled on weapon, doesn't matter which one).
10 bp: This one is really only worth if if you are running with law of valor, and you only really hit this breakpoint when you actually activate law of valor. Not really concerning ourselves with it. But if you want to fidle around with it a bit, try doing it on d3planner.com to make sure you hit the wanted breakpoint.
One important thing with attack speed is, its not calculated same on the wpn and other slots. On weapon it directly multiplies your entire attack speed, while on other slots they're all added up and then multiplied, meaning having it weapon it basically gives you more attack speed, and makes it easier to high next breakpoint.
2.4. Other offensive/utility stats
Other stats I've basically grouped up all together since for most people it won't really matter. You play with what gear you have. Most people won't have the luxury of spending hundreds of bounty mats rolling those perfect items anyway. The best way to figure out what is the best option and which pieces you should equip is by running your gear through d3planner.com. You have to figure it out as other ppl have no clue what you have stashed.
A short breakdown and what to use and what to avoid:
- Area damage: in solo it's really not that good. Yes if you have it on some hard to get piece, like an ancient compas that also has CC/CHD, sure why not. The problem with area dmg in solo is that you don't have any way to group up the mobs when you want it to. You have your follower (assuming you equipped them with ess of johan), and that's basically it. Most of the time the mobs won't be stacked too tight so the area damage really isn't the best stat you can get. The one slot that might be worth going for area% would be shoulders, if you're high enough paragon and can just spare some points in paragon and put them into vit. In groups however, it becomes extremely powerful as you will usually have a monk grouping up stuff, so there won't be the issue of mobs being too spread out.
- Resource cost reduction: this should be avoided, If you're running out of wrath you're probably not using provoke correctly, as in not hitting enough mobs with it when you use it. Having RCR basically means you could've had something more useful on that slot, like vit, allres or some other, offensive stat
- crit chance/crit hit damage: You basically have to balance between the two. For optimal results you should check this site and see which one would be the better option for you https://d3resource.com/critcalc/
- average damage: nice to have on rings, especially if you've stacked attack speed already. One thing to note is that the dmg% on the wpn doesn't affect the average damage on the jewelry
- move speed: you should always aim to have 25% move speed in total on gear+paragon, so keep that in mind
- max wrath: nice to have, I personally use all 50 pts in paragons on it. It means you have to spam provoke less when you have a lot of mobs around you, meaning easier to reset other cooldowns
2.5. Defensive stats
First of all All res gems are a must. After that you should try and focus on getting all res on shoulders, boots, pants. These 3 should be relatively easy slots to get it on (str+vit+allres are needed on all 3, with 4th stat being cdr on shoulders, hammer % on boots and sockets on pants). Secondary resistances are fine if you're unlucky with those slots.
One important thing to keep in mind is that some stuff will be killing you more than the rest. So take note of that. It might be just melee attacks meaning you maybe need more phys damage reduction or it might be something else. For me usually it's reflect damage affix, meaning I should get more arcane resistance (since reflect dmg reflect dmg as same type as you're causing, meaning arcane/holy). Just keep those things in mind.
Vit - you will probably have to put some paragon points into vit at some point. This one you kind of have to figure out for yourself how much is needed. On my 107 push in s10 I went with around 750-800k hp, if you're doing somewhere in the 90s you'll probably need 600-650k, but it also depends on your other stats and how much toughness you'll end up having. Noone can tell you how much you need, you kind of have to play for yourself and figure it out if you're missing more or not (as in if you're still dying even tho you are keeping all your defensive cds up).
2.6. Tips for some items
Chest is basically the biggest defensive stat stick you have, so try to load up on as many as you can. Str,vit, 3 stockets, elite dmg reduction, secondary resist/melee/ranged dmg reduction, try to get as many of those as possible. Rest of the slots are basically like they're listed on top of the page for each piece. You should get as many pieces as you can with a secondary res.
For lower paragons helm should look like this: str,vit hammer/crit, as you most likely will need that vit, and won't be able to afford putting para points into vit to have enough hp to survive.
For rings, if you have a bad coe, as in it still has str and/or another stat on it that isn't CC, CHD, CDR, IAS, AVG, its worth noting that cubing CoE and equipping zodiac might be the better, and easier option. This is especially true if you actually lack cdr on rest of your gear, and you could hit the next breakpoint by getting that attack speed. In case you do go for zodiac, stats you want are: IAS, CC, CDR, socket.
3. Some basic stuff to keep in mind
A lot of the time when people have issues with various things, be it dps or toughness, they often forget something and are unsure how to fix it because they don't fully understand how a certain thing works.
So, what do you need to keep in mind?
1. Faithful memory stacks
These are a huge deal, and are a separate multiplier from anything else. The way it works is:
one stack adds 60% dmg, meaning at one stack you will have 100% base dmg+ 60%= 160% dmg, at 10 stacks that will be 100+600% or you will do 7 times the normal damage.
Another thing to keep in mind here is that offensive buff from the faithful memory lasts 10 seconds, while defensive one from the set is only 8. Meaning if you're surrounded by dangerous affixes and cannot afford to drop the defensive buff, use falling sword.
Also, if you have for example 10 stacks, but killed most of the mobs off, after you've jumped, but it's still worth staying (for example to finish an elite off), try to hold off the new falling sword jump as long as possible, as the stacks are just overwritten if you jump again, meaning you'll just do less damage if there's less mobs to jump on.
2. When to use falling sword
Falling sword takes 1.5 seconds to perform, during which you're invulnerable. You can and should use that to your advantage whenever you can. You have to pay attention to where you're jumping as well. You have to aim to jump at the center of the mob pack to hit as many mobs as possible to get as many stacks.
Now, when do you want to jump? There's a few timings you have to keep in mind. First one would be, say, few moltens are going off. You can time it that you're mid air when it's exploding.
After that it's all about the CoE and remaining duration on the buff. Idealy you don't want to start a jump during last 2 seconds of fire CoE, as you'll miss some time of the Holy rotation, and you want to have some hammers already out by the time holy comes up, as CoE isn't snapshotted into the hammers, meaning the ones that are in the air when holy kicks in will do increased damage. Optimal would be trying to jump last 2 seconds of physical, so you have as many hammers as possible for the entire duration of holy (and you have your defensive up as well).
3. Hammer jammers
The sacred harness belt procs immobilize as it puts a judgement where you land. I feel this has to be said as some people completely miss this and are curious whats actually proccing the hammer jammers.
Same as faithful memory, this is a separate multiplier, meaning the mobs will take 5x increased damage once you land on them. (Yes, the separate multiplier means you do 35x the dmg to mobs that have HJ proc on them and you have 10 stacks of faithful memory).
No you don't need to take any special rune on falling sword, you should go for rapid descend to save as many zodiac procs. There's no point getting other runs as no matter what you do you will be jumping every 10 seconds at worst anyway and thats the duration of the HJ debuff on the mob.
4. Playing the rift
There's a few important things you have to keep in mind and a few things you have to master. The previous paragraph basically explained how some of the things work but what does that actually mean in the rift.
4.1 What should I play/skip?
Like with other classes there's few things that are good and bad for you on the hammer. The most important one is DON'T OVERSTAY on a spot. There's no point fighting 1-2% trash especially if you only have 4-5 stacks, when you can get a big clump of mobs just around the corner. Most of the times you can body pull stuff with you, by making sure mob is just at the edge of screen of you, or in other words, that you are out of range of his skills/attacks (especially if it's ranged mob).
The two worst affixes are Missile Dampening and Juggernaut. Juggernaut you can still fight against if you have decent density around you. Heck a lot of the times you'll even kill it just from area dmg and even with reduced damage you do to it. Missile dampening on the other hand should instantly be skipped. It will either get you killed, or will prevent you from killing anything. It stops your hammers from spreading out, which wouldn't be a bad thing if the hammers didn't only do dmg once to a single enemy. You are basically completely nerfing your damage by staying and trying to kill the missile dampening elite.
Other than that, most mobs are more or less doable. Some just make you take crazy damage so should be skipped (blazing constructs for example), but most mob types you can make progress with. Same goes with elites, almost everything is killable if there's enough trash around it and if you can body pull it easily with you. If you can't don't waste time trying to do it as it can lead you to failing the rift by obsessing with it, and maybe there's just a big clump of trash on the next floor that you can instantly blow up.
4.2. Followers and how to control them
There are a few skills you should avoid having on them. Charge on templar (3rd skill), and both charm and forceful push on enchantress (first skills). If you're going with echantress and you already picked one of the first skills, sadly you have to make a new char as there's no way to reset their skills any more.
Gear/stats for followers:
- Oculus
- relics that make them invulnerable
- if you are swapping out coe for unity, other slot obviously has to be unity
- ess of johan is the neck you want on them for grouping up trash, however it can backfire sometimes when they pull half of the trashpack away
- you can run stuff like sultan of blinding sand (roll weapon range into lightning damage, works only for enchantress) or thunderfury (even odyn son can work if you don't have a thunderfury), and pair them up with a wyrward
- you should stack cdr and attack speed on the followers as cdr lowers their skills
You'll have to learn this at some point if you're trying to push solo. Since there's no way to give them commands, the only way to reposition them is by basically moving far enough yourself till the follower teleports to your spot. Usually it has to be way out of screen so keep that in mind.
They also can be good for grouping up stuff. Once you're at the new spot and they're kinda in the correct position, you can move in all directions (not too far tho), and kind of get everything to the center by body pulling it and your follower keeps them occupied in the middle. This however doesn't always work as their AI can be extremely random at times.
4.3. Pylons
I would recommend not wasting too much time grouping up crazy amount of packs for those conduits and powers. Yes if it's some map that has a loop, and if you do the loop you'd end up at the same spot, but you have a chance to find a few packs on the way, sure, but don't waste too much time grouping up too many packs as it will just lose you time. Same goes with going too far to group up stuff and then having to run back to pick the pylon and then having to go back to the group of mobs. It's just not worth it. 2 Packs are definitively worth it for conduits. I've had as many as 6 packs solo on open maps after I've been already dragging mobs for a while when I discovered it, but doing a long preparation after you find the pylon really isn't worth it.
Power can be worth saving, but really isn't needed. You can easily nuke few packs with it (see my s10 102 clear, where I think I melted 3-4 packs, one of which was missile dampening), or you can also just save it for the boss if you're about to complete the rift, it saves a min or so on the boss (see my s10 107 clear). If you saved it for the boss, you should use power after you've stacked stricken for a bit. For how long, it kind of depends on how high you're doing. On my 107 I've stacked it for about 2:15, and I've probably overdid it by maybe 1-2 CoE rotations.
https://youtu.be/shXQyYJVWgo?t=675
Other 3 pylons aren't that great. Speed is alright for stacking stricken a bit faster, or skipping a map, channeling is only really good for skipping maps since your gear is already optimized (or should be) to having all the buffs up all the time. Shield can be really good if you have a lot of dangerous packs with you as it lets you just stand there and nuke it easily.
5. Build diversity and explanations on it
If you already like the build as is and don't want to change anything, you can skip this.
Now you probably have seen some people running with a bit different setups than mine. Usually it's Law of Valor that you see, and the reason for that is getting to the next breakpoint on attack speed, plus gaining some extra damage if they're going with critical, or going with unstoppable force so they don't have to worry about casting provoke too often. The unstoppable force is also usable if you want to run nemesis bracers, however I'd only recommend this for lower runs.
Some people run with flash rune on iron skin. In fact most guides recommend it but I don't. Reason for that is basically duration on iron skin. Having steel skin almost doubles the duration on it (from 4 to 7 seconds), meaning it shouldn't be dropping off, ever. Also you save zodiac procs (by not having to reuse iron skin every 4 secs) which then go into akarath or provoke. Also, how random zodiac is, a lot of the times you won't have iron skin ready to reuse when it's dropping off if you're running with flash, which will often lead to your death. I'm also pretty sure you will need that 4th piece of cdr if you want to play with it to get you to 50+% cdr without gogok. I'm not 100% sure on this one, as, like I said, I don't like this variation and I don't personally play with it, but if you do end up trying it and something feels wrong, it might be the extra cdr you're lacking.
Unity - for hardcore players I'm pretty sure this thing is a must (obviously you need to have it on follower as well along with oculus, to make it actually work). If you're playing SC, but even with all the other changes you've done to your build, if you're using correct amount of cdr, etc.., you find yourself dying and you don't really care about pushing the leaderboard, you can also go with unity. Just know that it's a pretty big dps loss compared to CoE.
Law of Justice (immovable object) - if you don't care much about having the ability to move through mobs,you can go with this law instead. In fact, I used to play with this at first as well. Basically it lets you just sit in some dangerous affixes sometimes when normally you would've had to move out. It's a huge dps loss in my opinion however, as when you get stuck in the middle of mobs, the only way to get out is by using falling sword, and that alone is a 1.5 second loss of casting hammers.
This is my clear from 102, which I ran with this spec (you can find the exact spec/gear on the d3planner link in vid description).
https://www.youtube.com/watch?v=ltx41k3Iop0
Last option for builds would be pain enhancer. It's not recommended unless your gear is really good. You lose a ton of toughness from not having that dodge, you often lose a breakpoint or two on the boss if you're fighting a single target boss, and on top of it all you need to gear up for more cdr (minimum 4 items with it to get you to 50+%). You do get a TON of damage in the rift however with this, and you'll often be hitting 4+ attacks per second, and just melting trash. I wouldn't recommend this for season with low paras, but it's a pretty good option for NS.
6. Skill breakdown
Falling Sword (Rapid Descend) - The skill itself makes you invulnerable for 1.5 seconds, but also means you cannot cast hammers during that time. There's a lot of discussion on this one, people are arguing for both part the clouds and flurry, but honestly neither of those two benefit you. When you jump with falling sword, you'll place a judgement on mobs in a radius that basically fits the same radius the bigger of the other two runes has (part the clouds). Mobs are already immobilized and have the hammer jammer buffs on them. You really don't get anything from other runes other than the chance to maybe stun some other mobs that walk into the trash pack. Problem is that part the cloud does not proc often, and it can proc on mobs that already have HJ proc on them, while flurry just has horrible radius. Seriously just stick to rapid descend and save yourself some zodiac procs. It might not look like much but every little bit helps when you're pushing.
Akarat's Champion (Prophet) - no discussion here, only viable rune is Prophet due to the +150% armor that it gives you.
Provoke (Too Scared to Run) - again the only viable rune. I've seen some people ruin with cleanse, but there isn't a point to that. To begin with you need to have at least 10 mobs around u all the time to get the max buff from it, which you won't for a lot of the time in the rift. On top of that, it's not even 11k life per hit that you gain from it which is basically worth one non weapon/neck item with lph. You also are actually going to take a lot more damage from mobs not having their attack speed slowed, which is extremely noticable with mobs that have those big attacks that hit like trucks, which you can easily dodge when they're slowed.
Iron Skin (Steel Skin) - Like I've explained in the build diversity section, there's really only 2 options here, one is running with flash and the other one is steel skin. The big problem of flash is the duration, which is only 4 seconds compared to the 7 you have on steel skin. This is extremely important since sometimes zodiac is just super random and unless you've stacked cdr more than you should've, you probably will find yourself without the iron skin buff and might end up dying.
Blessed Hammer (Limitless) - same as prophet, this is a fixed rune. Nothing else comes close to dealing the same damage as limitless.
Law of Hope (Wings of Angels) - It's similar to flash rune on iron skin. It lets you walk through mobs, and on top of it provides a small shield (128k ish hp). The purpose of using this law is going for oculus and moving out of dangerous affixes like molten etc, without having the need to use falling sword. It lets you stutter step (basically in my case since i have hammer on left click, I hold left mouse and force stand still, and then just quickly tap force move a little bit whenever I want to move somewhere). You can use something else here ofcourse, and I've gone over this in the diversity section as well. The one big plus for wings of angels over using flash rune on iron skin is that during shield, you can still go through mobs, while with flash rune you can't (since you need to be hit first to actually gain the buff).
Passives:
Indestructible - It really is needed. Yes you have a proc on your Akarat's champion but you will proccing so often, it's really necessary. Also you'll see those double procs quite often since Akarat procs only heals you up, while this makes you invulnerable for 5 secs, and makes you deal more damage.
Holy cause/Blunt - These are the only two passives that you can alter a bit. Holy cause is the one you should run with as it provies some much needed healing. However if you have multiple lph/lpws rolls on your gear you might want to try playing with blunt. Difference in damage is soo small it's usually not worth going for blunt.
Finery - More toughness, more damage, not much to say here. You should have by default 9 sockets already on your gear so this provides a 13.5% damage buff and increases your armor by same amount.
Fervor - Cdr is your most important stat, this provides a huge chunkof cdr. Not much else to say here
7. Additional notes
I will be still adding more stuff to this guide if something comes to mind. This was mainly done as a lot of the time people are asking the same questions, and the answer is basically always the same how to fix their issues so I figured I'd just make a guide for it all to have somtething to link.
Paragon Priorities
| Movement Speed |
| Primary Stat |
| Maximum Resource |
| Vitality |
| Cooldown Reduction |
| Attack Speed |
| Critical Hit Chance |
| Critical Hit Damage |
| Resist All |
| Life |
| Armor |
| Life Regeneration |
| Life on Hit |
| Area Damage |
| Resource Cost Reduction |
| Gold Find |
Comments