


Build Guide
GAME PLAY:
So it's pretty easy actually. First thing you do is activate AKARAT'S CHAMPION. Anything you kill while in this state will spawn a Phalanx Avatar. Normally these fellows will live for 10 seconds, but thanks to your Eternal Union ring, they will live for 30 seconds! Of course, you have to kill something first before they will spawn. That's where your bowmen come in. Always activate BOWMEN *and* your LAW OF VALOR - CRITICAL at the same time. You will have 8 bowmen that will live for 15 seconds (once again thanks to the Eternal Union ring) which as timing would have it matches perfectly with the cool down of your LAW OF VALOR. Get it? Short rule is this, every time your cool down for LAW OF VALOR finishes, re-activate it *and* your BOWMEN simultaneously. And don't forget to constantly babysit your cool down for AKARAT'S CHAMPION, or you will die.Of course, STEED CHARGE is here for mobility. FALLING SWORD - RISE BROTHERS is great here. One, FALLING SWORD in general is like a poor man's teleport. If you get walled in you can use this to escape. It's also good at crossing over to some hard to reach areas quickly. The fact that you are also creating 3 additional avatars in the process where you land is icing on the cake! And finally, BLESSED HAMMER - ICEBOUND is my crowd control. First, when AKARAT'S CHAMPION is active, you can spam this for nothing. Second, the cold has a chance to freezes enemies in their tracks. That buys precious time for your avatars and bowmen to hack away unchallenged. When I'm in a group, I'll use FALLING SWORD to jump into a group and start to spam my BLESSED HAMMER, and also activate my BOWMEN and LAW OF VALOR. I socket everything with diamonds for toughness. This makes me a good tank for taking agro while my avatars, and other players, attack from the peripheral. If I'm playing solo, I just kite around the peripheral and let my pets do all the work. And it does work, like a charm!
In place of BLESSED HAMMER, you could use BLESSED SHIELD - DIVINE AEGIS, but you would need to be a bit more careful about wrath using this. Of course, you could mitigate this by switching over to AKARAT'S CHAMPION - EMBODIMENT OF POWER, but you would forfeit your life insurance. Both of these alternate skills listed here will scale off of your Physical damage though, for a 100% Physical build! I, however, find it more difficult to play.
COOL DOWN REDUCTION:
OK, let's talk technical. First and foremost, this is an AKARAT'S CHAMPION build based on the AKKHAN SET. Before you can do anything else you *must* get your CDR to 56%. I don't know any other class that has to play as a permanent champion to be viable, but that just goes to show you how much Blizzard hates the Crusader. We have to waste precious attributes on this while other classes can focus on more important things, like DPS for example, but I digress. You have 9 pieces of equipment that can have the CDR attribute. One of them, your weapon, should *not* have CDR as there are other more important attributes it needs. In order to get a "sheet spec" of 56% CDR the total CDR% on all of your equipment needs to add up to 68.5%, and you need to have the full 10% CDR in your Paragon points. So let's break this down, shall we?- Akkhan Shoulder 8% of 8%
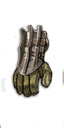
- Tasker & Theo Gloves 8% of 8%
- Eternal Union / Unity 8% of 8%
- Baleful Remnant 0% of 10% (Do *not* roll CDR here if possible)
- Akkhan Helmet (with Diamond socket) 12.5% of 12.5%
- Vigilante's Belt 8% of 8%
- (Amulet) 8% of 8%
- Ring of Royal Grandeur 8% of 8%
- Unrelenting Phalanx 8% of 8%
http://bannedofgamers.com/index.php?cdr/
ATTACK SPEED:
As if worrying about CDR wasn't enough, being a pet build, you also have to think about AS, and this is another convoluted subject. Luckily for us, it has a happy ending! So basically, if you want "machine gun bowmen", you have to ratchet up your AS. But, pet attack speed doesn't actually scale with your character sheet AS. Instead, pet AS increases in tiers, and you need to get your sheet AS past a certain threshold to make your pet's AS jump to the next tier. So here are the relevant tiers for this class/build...IF your sheet AS + T&T bonus is greater than 1.26 - THEN your pet's AS will be 1.43 attacks per second.
IF your sheet AS + T&T bonus is greater than 1.46 - THEN your pet's AS will be 1.67 attacks per second.
IF your sheet AS + T&T bonus is greater than 1.75 - THEN your pet's AS will be 2.00 attacks per second.
IF your sheet AS + T&T bonus is greater than 2.16 - THEN your pet's AS will be 2.50 attacks per second.
So this is not an easy subject to understand, but bear with me. Your sheet AS is the total of the AS of your Baleful Remnant, which is 1.15 attacks per second, multiplied by the sum of any and all extra AS% you have on your equipment (Tasker & Theo + Lacuni Prowlers / Steady Strikers), skills (Law Of Valor) and paragons. There are 6 pieces of equipment that can take the AS attribute...
- (Amulet) 5-7%
- Ring of Royal Grandeur 5-7%
- Eternal Union / Unity 5-7%
- Tasker & Theo 5-7%
- Lacuni Prowlers / Steady Strikers 5-7%
- Baleful Remnant 5-7%
- T&T 40% = You need an additional 17% AS, or 3 pieces having 6%, 6%, 5%
- T&T 41% = You need an additional 16% AS, or 3 pieces having 6%, 5%, 5%
- T&T 42% = You need an additional 15% AS, or 3 pieces having 5%, 5%, 5%
- T&T 43% = You need an additional 14% AS, or 3 pieces having 5%, 5%, 5%, or 2 pieces having 7%, 7%
- T&T 44% = You need an additional 13% AS, or 3 pieces having 5%, 5%, 5%, or 2 pieces having 7%, 6%
- T&T 45% = You need an additional 12% AS, or 3 pieces having 5%, 5%, 5%, or 2 pieces having 6%, 6%
- T&T 46% = You need an additional 11% AS, or 3 pieces having 5%, 5%, 5%, or 2 pieces having 6%, 5%
- T&T 47% = You need an additional 10% AS, or 2 pieces having 5%, 5% (the minimum roll of AS possible, T&T + LP/SS, you win!)
- T&T 48% = You need an additional 10% AS, or 2 pieces having 5%, 5% (the minimum roll of AS possible, T&T + LP/SS, you win!)
- T&T 49% = You need an additional 10% AS, or 2 pieces having 5%, 5% (the minimum roll of AS possible, T&T + LP/SS, you win!)
- T&T 50% = You need an additional 10% AS, or 2 pieces having 5%, 5% (the minimum roll of AS possible, T&T + LP/SS, you win!)
So here is the best news you are going to get in this write up. As long as you have [Tasker & Theo + Lacuni Prowlers / Steady Strikers], and as long as you have all 10% AS in paragons, then anytime your LAW OF VALOR is ACTIVE, your avatars will be at maximum attack speed... EVEN IF YOU HAVE THE LOWEST ROLL OF ATTACK SPEED ON YOUR [TASKER & THEO + LACUNI PROWLERS / STEADY STRIKERS] OF 5% AS EACH AND THE LOWEST PET BONUS ATTACK SPEED ROLL OF 40%. Isn't that awesome? Now, once your active LAW OF VALOR expires and you are now running on passive, your pets will drop down to the next tier, UNLESS YOU HAVE 47% PET BONUS PERCENTAGE ON YOUR TASKER & THEO, IN WHICH CASE YOUR PETS WILL BE AT MAXIMUM ATTACK SPEED ALL THE TIME, even if you have the minimum 5% AS on both your [Tasker & Theo + Lacuni Prowlers / Steady Strikers]! Otherwise you will have to have higher rolls on your [Tasker & Theo + Lacuni Prowlers / Steady Strikers], and/or subsidize some AS on a third piece of equipment to get a 100% up-time of maximum AS. But if that can be avoided, then all the better. Either way, if you have [Tasker & Theo + Lacuni Prowlers / Steady Strikers] you are going to see the maximum attack speed in some capacity, either 50% of the time, or 100% of the time.
Once again, just so you know where I'm getting my facts from...
http://www.youtube.com/watch?v=nXPYoD_qL3s
This video specifically focuses on Demon Hunter - Sentries, but the same information is applicable to Crusader - Phalanx, Wizard - Hydra, or any other pet from any other class. Is it worth all the hassle? Short answer... YES! Without a Tasker & Theo and Lacuni Prowlers / Steady Strikers, and without maximizing your bowman's attacks per second, you will never enjoy one of the true benefits from this build, and that is mowing down enemies like grass.
DAMAGE:
OK, there's no point in having your avatars shooting a million arrows a second if all they are doing is tickling the enemy and making them even madder. So we have to put some damage behind the attacks. There are two primary ways to do this. One is to maximize your Physical Damage %. Your Phalanx Avatars do Physical type damage. You can only get this from 2 sources, your amulet (maximum 20%) and your bracers (maximum 20%). Because it's so hard to come by, you really should have perfect rolls for both. Like I said, this build is a huge headache. It's also noteworthy that the Pet Gem, and the Pain Enhancer Gem both will scale off of you Physical Damage % increase. Deadly!The next thing is to maximize your Phalanx Damage %. There are 3 places you can do this... your helmet (maximum 15%), your boots (maximum 15%), and your shield (maximum 15%). Once again, these are *big* damage enhancers, and there are only a few places to get them, so you really should shoot for perfect rolls. I warned you you'd want to pull your hair out!
Last, when all else fails, go for Critical Hit Damage over Critical Hit Chance on your amulet (100%), rings (50% each), and gloves (50%), and only take Critical Hit Chance when no other options exist. You want your Baleful Remnant to have the maximum Strength, maximum Damage %, maximum life per hit, an emerald socket, and don't forget to use a Ramaladni's Gift to roll an extra bonus attribute!
Comments