


Build Guide
IMPORTANT: This is a SOLO ONLY BUILD which relies heavily on the “Can not die” relic for your follower.
EDIT May 15, 2015

- Added optional Generator skills to replace Provoke.

- Added skill images. (Images still not working...)
EDIT May 26, 2015

- Adjusted stat priority on re-rolls for some items.

- Changed Paragon stat priority to make Armor > Life Regen.

- Edited title to include estimated Rift Level capability.


FUTURE UPDATES:

- Video Guide

- Video Gameplay

- Get images of skills to work

- Add section for alternative followers.
I. PREFACE
I’ll start off by saying that I am not a hardcore (as in “I play Diablo all day long bro!) player. I play the game 1-2 hours a day at the very most. I find that the best way for a casual player to improve is for them to share their ideas, thoughts and experiences in the game with each other. That’s my reason for creating this guide so I hope you find it useful.
Many people say that Shield Bash is a squishy build and have been switching to Sweep Attack for higher rift levels however I really enjoy the awesome single target damage output that Shield Bash provides and would like to make it work. Who want’s to spend 10 minutes killing a Rift Guardian? Not me.
So after using the standard Fire Shield Bash spec with the Focus + Restraint ring set on my seasonal Crusader, I began to notice that (with level 25+ Esoteric and Molten Wildebeest gems and what seemed like enough Toughness) I still struggled surviving in GR40 when playing solo. This may be due in part to the lack of well-rolled and/or Ancient gear or even sloppy play style however I knew I needed to adjust something. This led me to swap a few items and skills around after the advice of folks on the Crusader sub-Reddit page.
Once I switched to this setup, I went from struggling to stay alive on GR40 to being able to comfortably finish GR45 without any problems. The main goal was not speed but progression and completion so unfortunately, I did not track or remember the time of the rift when I finished. I did however complete the rift with more than enough time left.
During the rift the most noticeable improvement was that instead of the Indestructible passive being on almost permanent internal cooldown, I only needed it once and that was due to a simple positioning mistake, otherwise Indestructible becomes "Life Insurance". I may consider switching Indestructible to Holy Cause for a little extra damage. I should also note that on the GR45 run, I had horrible luck with Pylons, getting only a Shield (not that I needed it at all) and a Speed. If a Conduit or Power pylon had been present, the run would’ve been much easier. So with some good luck, good monster density and careful play style I think that some of the defensive skills can be swapped to balance out the build.
At Paragon level 350, my gear at the time of this guide consists of a regular Furnace as my weapon, 2 decently rolled Ancient Roland’s set pieces with all other Roland’s items being normal. I also had a poorly rolled Piro Marella. Once I obtain a few upgrades I will record a video of gameplay and possibly create a video guide for this build if I can get a respectable position on leaderboards in the coming weeks.
Elite packs and Rift Guardians still die fairly quickly, much quicker than a Whirlwind Barb for example. The loss of the Focus & Restraint rings is definitely noticeable off the bat, as is swapping Laws of Valor (Critical) to Laws of Justice (Immovable Object) however with careful Wrath management, good positioning and a little bit of luck
The core abilities of the FireBash build are still in tact, as is most of the gear however there have been a few minor changes that exponentially increase your survivability. Please see below for more detailed information on the build.
II. THE BUILD
Primary Skills

Shield Bash + Crumble (Required) - By now you most likely know that with the launch of patch 2.2, the Roland’s set now gives Shield Bash a gigantic buff. A 500% buff to damage to be specific. It is important to know that this skill benefits from your Block Chance. Shield Bash is incredibly powerful against Elites and Rift Guardians. Thanks to the Crumble rune, your Shield Bash will now do Fire DMG and also knock enemies back.

Provoke + Hit Me (Optional*) - To help gather up enemies and generate Wrath you will use Provoke. The Hit Me rune provides a 50% buff to your Block Chance for 4 seconds, thus increase the damage of Shield Bash.
*See Optional skills below.

Shield Glare + Zealous Glare (Required) - A great defensive skill that was rarely used in prior seasons, Shield Glare blinds enemies in it’s conical path (up to 30 yards) for 4 seconds. Thanks to the 4 piece bonus of the Roland’s set (Every use of Shield Bash reduces the cooldown of your Laws and Defensive Skills by 1 second), Shield Glare is on an extremely short cooldown and can be used very often to not only blind enemies but to also generate Wrath thanks to the Zealous Glare rune.

Iron Skin + Steel Skin (Required) - Another defensive skill that helps greatly increase your survivability, Iron Skin also benefits from the 4 piece bonus of the Roland’s set, making it a very short cooldown. With the Steel Skin rune, you will gain an absorption of all damage up to 50% for 7 seconds.

Laws of Justice + Immovable Object (Required) - Great for Elite packs and Rift Guardians (or just about any tough pack), Laws of Justice grants you 490 Resist All for 5 seconds when it is active. When it is passive, you gain 140 Resist All. The Immovable Object rune provides an armor boost for 5 seconds.

Akarat’s Champion + Prophet (Required) - A staple in almost every single Crusader build, Akarat’s Champion provides a substantial damage buff of 35% and also increase your Wrath regeneration by 5 for 20 seconds. With the Prophet run, you add even more survivability by giving yourself 150% more Armor. If that isn’t enough, you also get a “Second Life” when the first time you take near fatal damage, you will be healed to full health (this effect can occur only once within the use of Akarat’s Champion)
Passive Skills

Finery (Required) - This is a huge Damage increase due to how this passive multiplies the amount of gems in your gear. Any Gem will count towards this bonus, regardless of its rarity, color and quality, even Legendary Gems count. Considering that there is a total limit of 11 gems per character, this effect stacks up to 16.5%.

Indestructible (Optional) - Considered as “Life Insurance” in this build, this passive basically gives you a second life should you need it. It can occur once every minute. If you find that you do not need this passive on a regular basis, you can swap this out for Holy Cause to get a 10% Damage bonus plus a little healing boost.

Towering Shield (Required) - This passive provides a 20% damage increase to Shield Bash and also reduces the cooldown of your Shield Glare by 30%. It is absolutely required to run any Shield Bash build.

Heavenly Strength (Required)- A completely necessary passive since you can not use a two-handed weapon plus a shield without it. I wish that Blizzard would just remove this passive from the game and give Crusaders the ability to wield 2H flails plus a shield from the get go.
Holy Cause (Optional)- If you are finding that you are having zero issues surviving and feel that you can sacrifice the "Life Insurance" of Indestructible, Holy Cause is a great alternative that provides you with a straight up 10% Damage increase.
Optional Skills
Depending on your gear, the rift, pylon luck, monster density and the many other RNG (Random Number Generator) factors that are baked into Diablo III, you may find yourself needing to make a few changes. Luckily this build is fairly flexible with a few skills. You can swap Provoke with a generator such as Punish or Justice. The following explains what each skill does and what situation they'd be helpful in.

Punish + Roar - Common in most Shield Bash builds, Punish is an all-around great primary skill to use. Each attack generates 5 Wrath and gives you a buff called Hardened Senses, which increases your Block Chance by 15% for 5 seconds. If you recall earlier, Shield Bash works directly with your Block Chance thus making Punish a nice damage booster if you keep Hardened Senses up. In regards to runes, you have several options however due to this build being based on Fire Damage, you will be best served by choosing the Roar rune. Roar essentially buffs the Hardened Senses so that when you block while it is active, you deal 75% weapon damage as Fire to all enemies within 15 yards. It is important to note that if you do not have one of the belts mentioned in this guide, you can use the Angel Hair Braid belt to unlock all runes for Punish.

Justice + Hammer of Pursuit* - Another option to replace Provoke is the generator skill, Justice. Being one of the few ranged attacks within the Crusader skill set, Justice makes for a suitable generator that when paired with the Hammer of Pursuit rune becomes a sort of "heat seeking missile" that literally seeks out targets, even when they are not in your line of sight. It unfortunately isn't nearly as powerful as Punish (due to the Hardened Senses buff being extremely powerful) but Justice does come in handy when you come up against nasty affixes that make it hard to get in close without eating dirt. You can use Justice along with the Blessed of Haull belt if you do not have any of the belts suggested in this guide.
*Thanks to fellow guide creator Rejuvyn for the suggestion on Justice, I had not considered it until I read his guide. Check out his awesome Physical Shield Bash Group guide.
III. THE GEAR
This build is centered around the Roland’s set to provide huge damage boosts to Shield Bash, as well as cooldowns on your Laws and defensive skills. The 6-piece bonus is mandatory and while debatable provides a gigantic damage boost. The downside to the 6-piece bonus is that you will spend much more Wrath if you are not careful. Thankfully, we have a CRAFTABLE Shield that reduces the Wrath cost of Shield Bash by up to 50%. Yes, you read that right. The Piro Marella is a craftable item. I need to stress that multiple times due to the sad fact that I have seen multiple players talk about how they have spend thousands of Blood Shards at Kadala hoping to get a Piro Marella shield. Don’t make the same mistake. Unfortunately, some players have struggled to obtain the Blacksmith Plans for the shield. If you’re lucky enough to get the drop, craft away my friend.
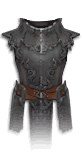
Helm - Roland’s Visage (Required)
Prioritize Strength, Socket (see Socketing below) and Vitality on the helm. You want to find a Helm with Critical Hit Chance + Shield Bash Damage +15% on it.
Shoulders - Roland’s Mantle (Required)
Prioritize Strength, Vitality, All Resist and Life %.
Amulet - Mara's Kaleidoscope
At the time of writing this guide, I’ve yet to see a single one of these drop however it is considered one of, if not the best resistance amulet in the game. Many Rift Guardians have a poison attack, making the affix on this amulet incredibly powerful. You will want to prioritize a Socket (see Socketing below), Critical Hit Damage, Critical Hit Chance and Fire Damage %. There are plenty of good amulets in the game. Alternatives are Xephirian Amulet, Blackthorne’s Duncraig Cross and finally, Eye of Etlich. If you are in need of more offensive firepower, craft a good Hellfire Amulet. You can learn how to craft one here
Torso - Roland’s Bearing (Required)
Prioritize Strength, Reduced Damage from Elites (11%), Vitality and Sockets (see Socketing below).
Wrists - Drakon’s Lesson
The Drakon’s Lesson bracers were introduced in patch 2.2 and are based around the Shield Bash skill. The unique secondary affix gives you a 150-200% damage increase when your Shield Bash hits 3 or less enemies. If that’s not enough to entice you to use these bracers, 25% of the Wrath cost is also refunded! Not bad right? You will prioritize Strength, Vitality, Critical Hit Chance and Fire Damage %.
Hands - Roland’s Grasp (Required)
You will prioritize Strength, Vitality, Critical Hit Damage and Critical Hit Chance.
Waist - String of Ears
I didn't find any belts that fully synergize with the Fire Shield Bash build so in this case, String of Ears will provide 25-30% reduced melee damage and is an all around great belt. It doesn't have any fun secondary affixes but it will get the job done. Prioritize Strength, Vitality, All Resistances and Armor.
Legs - Roland’s Determination (Required)
Prioritize Strength, Vitality, All Resist and Sockets (see Socketing below)
Feet - Roland’s Stride (Required)
Prioritize Strength, Vitality, All Resist, Shield Bash Damage (15%)
Ring #1 - Convention of Elements
I recently started using this ring on my Crusader (it was previously used by my Barbarian) and I’ve been pleasantly surprised by the damage boost that it can provide when timed with Akarat’s Champion. This ring cycles between the elements of your class one by one, in order giving the element 150-200% increase damage. If you line the Fire element buff up with your Akarat’s Champion cooldown, you can see some nice damage output. Another added bonus is that it naturally rolls a socket and Critical Hit Chance! An alternative yet still inferior ring to CoE is the Stone of Jordan. Prioritize Critical Hit Damage, Critical Hit Chance, Strength, Vitality.
Ring #2 - Unity (Required)
Only effective in Solo play, the Unity ring splits all damage taken between the wearers of the ring, meaning that any damage you take will be split between you and your follower (who is also wearing a Unity). This is a huge (+50%) survivability boost, especially since your follower will also be wearing the “Can Not Die” relic, thus making the amount of damage split unable to kill your follower. Do you follow me? Ha. Prioritize Socket (see Socketing below) Critical Hit Damage, Critical Hit Chance, Damage vs Elites, Strength.
Weapon - The Furnace
Luckily, the Shield Bash build can work with just about any two handed weapon but our trusty two handed mace; The Furnace tops them all. In Ancient form or not, The Furnace is best in slot. The Fire Damage % affix works along with the Crumble rune of Shield Bash. You will want to have +10% Damage, a socket (see socketing below), Strength and Vitality. The Furnace naturally rolls Increased Damage to Elites % up to 50% making it an extremely powerful weapon. Adequate weapons include the two handed swords; Blood Brother and Maximus but once again, almost any two handed weapon will get you up and running.
Shield - Piro Marella (Required)
As mentioned before, the Piro Marella is a CRAFTABLE shield. It always rolls an affix that reduces the Wrath cost of Shield Bash by up to 50%. You will want to prioritize Strength, Vitality, Shield Bash DMG % and Block Chance on this shield. Critical Hit Chance is also a nice stat to have but I would prioritize Shield Block over it due to the mechanics of Shield Bash, plus the added bonus of defense. Seeing as you can craft this shield, you will want to try to aim for one that has either Shield Bash DMG % or Block Chance % naturally. The absolute perfect roll would be Strength, Vitality, Critical Hit Chance, Shield Bash Damage (15%) and Block Chance %.
Exceptions:
If you do not have 6 pieces of Roland’s set, you may substitute the Convention of Elements ring for a Ring of Royal Grandeur. This allows you to have 5 pieces of the set and still get the 6 piece bonus. You can obtain the Royal Ring of Grandeur from Act I Bounty caches (complete all bounties in Act I and speak to Tyreal).
If you are going to use the Ring of Royal Grandeur, some suitable survivability-based items* to use until you get full Roland's are the following:
- Pauldrons of the Skeleton King (Shoulders)
- Leoric's Crown with an Amethyst gem (Head)
You can also use an item from the following craftable sets:
- Aughild's Authority
- Born's Defiance
- Captain Crimson's Finery
- Cain's Fate
There are other items you can swap in but keep in mind that you need the 6 piece bonus to maximize your damage. These alternative items are only there to hold you over until you get your full Roland's set.
*Thanks to Reddit user Rejuvyn for pointing out that I missed this in the guide.
IV. GEMS
Ideally you will have a total of 10 sockets to place gems. Your shield can have a socket but this is not ideal. There is a little bit of flexibility here depending on the quality and stat rolls of your gear. I will explain two methods of placing gems in your gear.
Method 1: I NEED MOAR DMG!11!!!
You will be using the best quality Ruby in your chest and leg pieces, totally up to +1400 Strength. In your helm, you will place the highest quality Diamond gem, giving you up to 12.5% Cooldown Reduction. You will place the highest quality Emerald in your weapon, giving you up to 130% additional Critical Hit Damage.
Method 2: YO I’M STILL DYING WTF?!?!
If you still have trouble with surviving (you really should not), you can replace Ruby gems with Diamonds thus giving you up to +78 Resistance to all Elements (per gem). You will place an Amethyst in your helm for +21% life, thus sacrificing the Cooldown Reduction. This very well may be overkill for most players so ultimately, you will need to test things out. You will still use an Emerald in your weapon.
But what about Legendary Gems bro!?
In your rings and amulet, you will place the following Legendary Gems:
Bane of the Trapped (required): This is a very powerful gem when leveled to 25 and up. As the tooltip says, it increases your damage against enemies under the effects of control-imparing effects by 22.5% (@ gem level 25). You will also gain an aura that reduces the movement speed of enemies within 15 yards by 30%. This works very well with your Shield Glare, as well as your Templar’s abilities.
Molten Wildebeest's Gizzard: I not only love the name of this gem but I also love it’s effect! This gem regenerates 35000 Life Per Second (@ gem level 25) and also gives you a shield that absorbs 200% of your total Life per Second. You activate the shield when you do not take damage for 4 seconds. One tactic is to pull out of a pack of monsters, run and have the shield re-activate, then return to fighting.
Esoteric Alteration: This gem gives you a 22.5% reduction to all non-Physical damage (@ gem level 25). It also provides you with a passive that when below half health, your gain +75% to All Resistances.
Mutilation Guard: Another defensive gem, this provides you with a 35% reduction to incoming melee damage (@ gem level 25). It also provides you with a passive that when below 30% life, you may move unhindered through enemies. This can work well with the absorb shield from the Molten Wildebeest gem.
Taeguk: If you are noticing that you are lacking damage and survivability is not a problem, you can replace your third gem with this bad boy. It gives you 0.5% increased damage for 3 seconds after spending a primary resource. That doesn’t sound like a lot at first but the effect stacks up to 45 times (@ gem level 25) giving you 22.5% damage increase (@ gem level 25). It is easily considered one of the most popular offensive gems in the game and seeing as you will be spending Wrath like it’s going out of style, you will almost always have your max stacks up.
TIP: to help determine what your Legendary Gem’s stats will be as you level them.
IV. YOUR FOLLOWER
You can use any follower for this build so as long as they have the "can not die" relic however your old pal Kormac the Templar is the best option. Sure he's not as funny as the Scoundrel but due to his heals, stuns and other awesome skills he excels over the other two followers, at least as of writing this guide.
Enchantress - Smoking Thurible (these drop like crazy for me)
Scoundrel - Skeleton Key
Templar - Enchanting Favor (I'm still waiting for this to drop!)
No matter which follower you choose, you will need to equip both the follower and yourself with a decent Unity ring. When using the Templar, I also have him geared up with a Thunderfury (reduces movement speed of foes) sword + Wyrdward (chance to stun) ring. Alternatively, you can equip your Templar with Bul-Kathos Wedding Band since he is almost always in melee range. If you are using the Thunderfury+Wyrdward combo you will want to enchant your Templar's gear with Attack Speed % for quicker attacks, more chance to stun. He should also have ample Cooldown Reduction to reduce the cooldown of his heals. I also like to equip my Templar with the Ess of Johan amulet, which has a chance on hit to pull enemies towards your target and slow them by up to 80%.
Alternative Weapons for Templar:
Eun Jang Do - This is excellent for fights against Rift Guardians. This Dagger freezes the target of your Templar when it gets below a certain percentage of HP, thus making the fight an auto win.
Sun Keeper - You can use this if you don’t have a Thunderfury or Eun Jang Do. The Increases damage against elites stat helps with Rift Guardians.
The Butcher’s Sickle - This Axe has a nice secondary that has a 20-25% chance to drag enemies to you. This helps to gather monsters up to get bashed right in their filthy faces.
V. PARAGON POINTS
Like most other Crusader builds you will be prioritizing Movement Speed, Strength, Critical Hit Chance, Critical Hit Damage, Resist All, Life, Area Damage and Resource Cost Reduction. Everything else is just gravy on top.
VI. GENERAL TIPS ON GAMEPLAY
- When starting your assault on a pack of monsters, try to line them up so that you initially only strike one target. This takes a lot of practiceI haven’t even come close to perfecting it yet. What this does is gives you the bonus from your Drakkon’s Lesson bracers and also makes the Crumble rune work.
- When you start taking heavy damage, try to escape the monsters so that you can reset your Molten Wildebeest’s Absorb Shield.
- If you find that you are doing too little damage and not dying at all (keep an eye on Indestructible) then feel free to start peeling back defensive stats for damage stats. I’ve found that by peeling away in the following order has worked best:
1. Swap defensive gems to offensive gems (ex: swap Esoteric for Taeguk)
2. Re-roll defensive stats to offensive stats (ex: re-roll Resist All to Critical Hit Chance)
3. Swap defensive skills to offensive skills (ex: swap Indestructible with Holy Cause)
4. Swap defense oriented gear with offensive gear (ex: swap Mara’s Kaleidoscope with Hellfire Amulet)
VII. CLOSING
Despite what the cynical players say, Blizzard has given us the freedom to experiment, test and play with multiple builds and combinations of gear, skills and stats. This build almost certainly won’t get you in the top 10 on the leaderboards but it will improve your survivability. I encourage you to make adjustments to the build. If you do, please post what you did here.
-
View User Profile
-
Send Message
Posted May 18, 2015Hi thanks for checking the build out. I did indeed try Cindercoat and RROG out however I saw a pretty substantial decrease in Damage due to losing out on the CoE ring. Granted, the RROG I had did not have a natural socket and also did not have good stats (CHC+CHD+STR). Maybe if I found an extremely good RROG, the outcome would be different.
Also, this does not need to be Seasonal. You can use it in NS.
-
View User Profile
-
Send Message
Posted May 27, 2015Very well written guide, thanks so much for sharing! Couple of questions:
The stat priorities I see on each item don't match the ones in your description. Is this just an oversight? Which priorities are the ones to go by?
Also, I want to give build a try but don't have The Furnace yet. I do have a Maximus with Fire Damage, Damage %, STR, and Fire % Increase though, which of these stats should I reroll for a socket? Thanks!
-
View User Profile
-
Send Message
Posted May 28, 2015I apologize for that, I forgot to fix the stat priorities in the item section. For now, use what's in the description.
That's a really tough decision on the Maximus. Can you link a screenshot so I can see the stats? Also, have you considered using a Gift for the socket?